Website Launch Checklist: What to Check Before a Client Site Goes Live
Launch day is where small mistakes get expensive. A site can look perfect on staging and still go live with search engines blocked, forms that never deliver, or old URLs that all 404. This website launch checklist is the one I actually run before a client site goes live, and again in the first hours after.
None of it is exotic. Most of these checks take a minute each. The trouble is that there are a lot of them, and the one you skip is usually the one that bites. So I keep them written down and I go through them in order, every time.
Key takeaways
- The most common launch mistake on WordPress is leaving “Discourage search engines from indexing this site” switched on. It adds a
noindex, nofollowrobots meta tag to every page.- Map every old URL to a new one and set up 301 redirects before DNS changes, not after.
- Lower your DNS TTL a day or two before cutover so a rollback doesn’t take hours.
- Test forms end to end on the live domain, and set up SPF, DKIM and DMARC so the emails land in an inbox.
- Take a full backup right before launch and know exactly how you’d restore it.
- Hand the client a short document with logins, renewals, backups and who to call.
Short answer: a website launch checklist covers four areas. Indexing (noindex off, robots.txt, sitemap, Search Console), migration (301 redirects, canonicals, HTTPS), function (forms, email, analytics, performance, accessibility) and safety (backups, monitoring, DNS, cleaned-up accounts). Run it on staging first, then again on the live domain right after cutover.
What is a website launch checklist?
A website launch checklist is a written list of technical and content checks you complete before and right after a site goes live. It exists because launches mix many small settings across hosting, DNS, the CMS and third-party tools, and memory alone misses some. It turns a stressful day into a repeatable routine.
For me it also does a second job. It’s proof for the client. When they ask “did you check the redirects?”, I can show them the list with every line ticked, instead of saying “I think so.”
I split mine into three moments: the week before, launch day itself, and the first 24 hours after. Some checks happen in more than one moment on purpose. Robots settings, for example, get checked on staging and again on the live domain, because a database copy can carry staging settings straight into production.
What should a website launch checklist include?
A good website launch checklist includes indexing checks, redirects, HTTPS and security headers, forms and transactional email, analytics and consent, performance, accessibility, social previews, structured data, backups, monitoring, DNS planning and account cleanup. Group them by when you do them, so nothing waits until the last minute.
Here’s the overview I work from. The sections below explain each one.
| When | Check | What “done” looks like |
|---|---|---|
| Week before | URL map and 301 redirects | Every old URL has a target, rules tested on staging |
| Week before | Performance and Core Web Vitals | LCP, INP and CLS in the “good” range on key templates |
| Week before | Accessibility basics | Keyboard navigation, alt text, contrast, form labels |
| Week before | Social previews and structured data | Open Graph tags, favicon, valid JSON-LD |
| 1 to 2 days before | DNS TTL lowered | Records at around 300 seconds |
| Launch day | Full backup | Files and database saved off the server |
| Launch day | Search engine visibility | No noindex, robots.txt allows crawling |
| Launch day | HTTPS and HSTS | Valid certificate, HTTP redirects to HTTPS |
| Launch day | Forms and email | Test submission received, SPF, DKIM and DMARC pass |
| Launch day | Sitemap and Search Console | Sitemap submitted, homepage inspected |
| First 24 hours | Monitoring | Uptime alerts on, 404s and errors reviewed |
| First 24 hours | Cleanup and handoff | Test accounts removed, handoff doc sent |
Why is my new website not showing up on Google?
The most common reason is that indexing is still blocked from development. On WordPress that’s usually the “Discourage search engines from indexing this site” checkbox under Settings > Reading. Since WordPress 5.3 it adds a noindex, nofollow robots meta tag to every page, so Google drops the site even though robots.txt looks fine.
This one catches experienced people, because many of us still expect the old behavior. Before 5.3, WordPress put Disallow: / in the virtual robots.txt. Now it doesn’t touch robots.txt at all for this setting. You open robots.txt, it looks clean, and you move on. Meanwhile every page says noindex in its head.
So check the setting itself. In wp-admin, go to Settings > Reading and make sure the box is unticked. With WP-CLI it’s quicker:
wp option get blog_public
# 1 = search engines allowed, 0 = discouraged

wp option update blog_public 1
Then confirm on the live page, not the dashboard. View the source of the homepage and search for robots. Also check the response headers, since some hosts and staging plugins add an X-Robots-Tag: noindex header that never shows up in the HTML.
Google’s documentation on blocking indexing with noindex makes a point worth remembering here. If robots.txt blocks a page, Google can’t crawl it, so it never sees the noindex. Blocking and noindexing do different jobs. I went through the full difference in noindex vs robots.txt vs canonical.
A simple, launch-ready robots.txt for most WordPress sites looks like this:
User-agent: *
Disallow: /wp-admin/
Allow: /wp-admin/admin-ajax.php

Sitemap: https://example.com/sitemap_index.xml
That’s close to what WordPress generates by default, plus a sitemap line. If the staging site had Disallow: / in a physical robots.txt file, delete or replace it before launch.
How do I submit a sitemap to Google Search Console?
Find your sitemap URL, add the site as a property in Google Search Console, verify ownership, then open the Sitemaps report and submit that URL. WordPress core serves one at /wp-sitemap.xml since version 5.5. Yoast SEO replaces it with /sitemap_index.xml, so submit whichever your site actually uses.
I prefer a Domain property, verified with a DNS TXT record. It covers HTTP and HTTPS, www and non-www, and every subdomain in one place. If the client already has a property, ask for access instead of creating a duplicate. Their history is worth keeping.
After submitting, use the URL Inspection tool on the homepage and one or two key pages. It shows whether Google can fetch the page and whether it found a noindex. You can also request indexing from there, which is handy on launch day.
One more thing. Open the sitemap in a browser and click a few URLs. I’ve seen sitemaps full of staging domains after a migration. They pass validation and point at the wrong site.
How do you set up 301 redirects when replacing an old website?
Export every URL from the old site, map each one to its closest new page, and add permanent 301 redirects at the server or CMS level before switching DNS. Redirect to the final URL directly, avoid chains, and don’t send everything to the homepage. Google recommends keeping redirects for at least a year.
This is the check that protects a client’s existing search traffic. Skip it and every old link from Google, social posts and other websites lands on a 404.
To build the list, I pull URLs from the old sitemap, the old site’s Search Console data, and analytics landing pages. Then I put them in a spreadsheet with two columns, old and new. Images and PDFs count too if people link to them.
Google’s guide to site moves with URL changes is clear on the details. Use permanent redirects like 301 or 308. Avoid chains. Redirecting lots of old URLs to an unrelated page, like the homepage, can be treated as a soft 404.
On Apache, simple one-to-one rules can go in .htaccess:
Redirect 301 /services.html https://example.com/services/
Redirect 301 /about-us.php https://example.com/about/
On Nginx, inside the server block:
location = /services.html {
    return 301 https://example.com/services/;
}
On WordPress without server access, a redirect plugin works fine for a few dozen URLs. For hundreds, I’d rather put them in the server config, where they don’t depend on PHP loading.
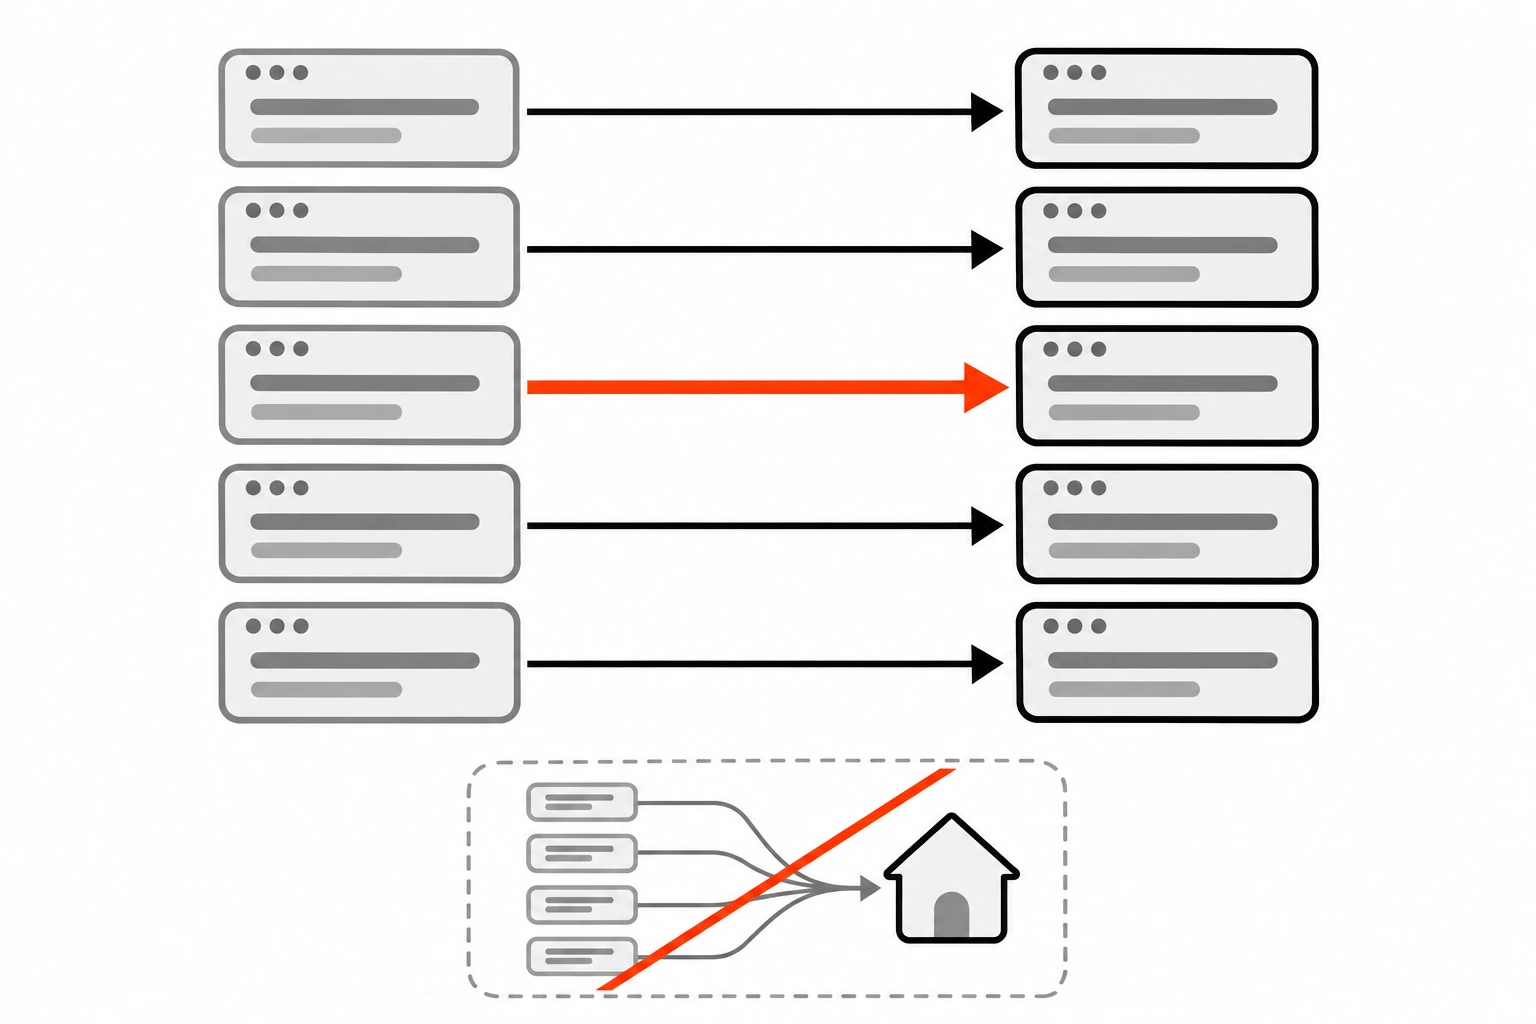
Test them after launch, not just before. A quick loop with curl over your old URLs shows the status code and target for each one.
curl -sI https://example.com/services.html | grep -iE "^(HTTP|location)"
# HTTP/2 301
# location: https://example.com/services/
How do you check HTTPS and HSTS before launch?
Confirm the SSL certificate covers every hostname you use, including www, then check that plain HTTP redirects to HTTPS in a single hop. Look for mixed content warnings in the browser console. Add a Strict-Transport-Security header once HTTPS is stable, starting with a short max-age and raising it later.
Most hosts issue a free Let’s Encrypt certificate automatically now, but only once DNS points at them. That means the certificate often can’t be issued until launch day itself. Plan for a short window where you’re waiting on it, and test straight after.
A header check with curl tells you most of what you need in one go:
curl -sI http://example.com | grep -iE "^(HTTP|location)"
curl -sI https://www.example.com | grep -iE "^(HTTP|location|strict-transport-security|cache-control|x-robots-tag)"
You want one redirect from HTTP to the canonical HTTPS host, no x-robots-tag: noindex, and sensible cache headers.
HSTS is a header that tells browsers to only ever use HTTPS for your domain. It’s great, and it’s also hard to undo, because browsers remember it for the whole max-age. I start new launches with something like max-age=300 and raise it to a year once I’m sure every subdomain works over HTTPS. Only submit to the preload list at hstspreload.org when you’re certain, since it requires a max-age of at least one year plus includeSubDomains. I explain the rollout in more detail in my post on HSTS and Strict-Transport-Security.
While you’re in the headers, check that each page has a self-referencing canonical tag pointing at the live HTTPS URL. A canonical copied over from staging is a quiet way to tell Google your real pages are duplicates of a site that shouldn’t exist.
Why do contact form emails go to spam after launch?
Usually because the site sends mail from the client’s domain without proper authentication. Gmail and other providers check SPF, DKIM and DMARC records in DNS. If they’re missing or wrong, form notifications and order emails land in spam or vanish. Send through an authenticated SMTP or email API service instead of the server’s default PHP mail.
Forms are the reason many small business sites exist at all. So I test every single form on the live domain, with a real submission, and I check the inbox that’s supposed to receive it. Not the plugin’s “message sent” screen. The actual inbox, spam folder included.
Here’s what each record does:
- SPF is a DNS TXT record that lists which servers may send mail for your domain. A domain should have only one SPF record.
- DKIM adds a cryptographic signature to each message, checked against a public key published in DNS.
- DMARC tells receiving servers what to do when SPF or DKIM checks fail, and where to send reports.
A starting DMARC record often looks like this, then gets tightened over time:
_dmarc.example.com. TXT "v=DMARC1; p=none; rua=mailto:dmarc-reports@example.com"Google’s sender guidelines require every sender to Gmail to set up SPF or DKIM, and bulk senders need all three. A small business site won’t hit bulk volumes, but there’s no reason not to do it properly. On WordPress I route mail through an SMTP plugin connected to the client’s email provider or a transactional service, then send a test from the plugin’s own tester.
Should analytics and cookie consent be live on launch day?
Yes. Install analytics before launch so the first day of traffic is recorded, and test it with the real-time report while you click through the live site. If the site serves visitors where consent laws apply, such as the EU, the consent banner must block tracking tags until the visitor agrees.
The usual mistakes are boring ones. The tracking ID is still the staging property. Or the tag fires twice because it’s added by both a plugin and Google Tag Manager. Open the real-time report, load a page in a private window, and confirm exactly one page view arrives.
If the client runs Google Ads, they’ll likely need Google Consent Mode v2 wired into the consent banner for visitors in the European Economic Area. I check that tags really wait for consent by loading the page, declining, and watching the Network tab in DevTools for requests to analytics domains. There shouldn’t be any.
Also add conversion tracking for the things the client cares about. Form submissions, calls, purchases. Nobody remembers to set it up a month later, and then there’s no baseline.
How fast should a website be before launch?
Aim for all three Core Web Vitals in the “good” range on your main templates: Largest Contentful Paint at 2.5 seconds or less, Interaction to Next Paint at 200 milliseconds or less, and Cumulative Layout Shift at 0.1 or less. Google measures these at the 75th percentile of real page loads.
Those thresholds come from web.dev’s Core Web Vitals guide. INP replaced First Input Delay as a Core Web Vital in March 2024, so older checklists that mention FID are out of date.
Before launch you only have lab data, from Lighthouse in Chrome DevTools or PageSpeed Insights. Real user data in the Search Console Core Web Vitals report takes weeks to build up. Lab scores are still very useful for catching the big problems, so test the homepage, a service or product page, a blog post and the contact page on mobile settings.
| Metric | Good | Usual launch-week culprit |
|---|---|---|
| LCP | 2.5 s or less | Huge hero image, lazy-loaded hero, slow server |
| INP | 200 ms or less | Heavy sliders, chat widgets, too many third-party scripts |
| CLS | 0.1 or less | Images without width and height, late-loading banners and fonts |
Images are the easiest win. Export them at the size they’re displayed, serve WebP or AVIF, and never lazy-load the hero image. I wrote a full walkthrough on LCP image optimization if the hero is the slow part.

Caching matters too. Static files like CSS, JS, fonts and images should come back with a long Cache-Control max-age when their filenames change on every build, while HTML should stay short or revalidate. Check this with the same curl -I command. My guide to Cache-Control headers has the exact values I use.
What accessibility and content checks matter before launch?
At minimum, check that every page works with a keyboard alone, images have meaningful alt text, text has enough color contrast, form fields have labels, and headings follow a logical order. These basics catch most of the real barriers people hit, and they’re far cheaper to fix before launch than after.
My quick pass takes about fifteen minutes per template. Tab through the page and watch the focus outline. Can you reach the menu, open it, and close it? Can you submit the form and read its error messages? Then run an automated checker like axe DevTools or Lighthouse’s accessibility audit, keeping in mind that automated tools only find some issues. For the full list, I keep a WCAG 2.2 checklist.
Then the content and polish items that people notice straight away:
- A custom 404 page that returns a real 404 status code, with a search box or links back to the main pages. A “not found” page that returns 200 shows up as a soft 404 in Search Console.
- A favicon, including an Apple touch icon, so the site doesn’t show a blank tab icon or a hosting company logo.
- Open Graph and Twitter card tags with a proper share image, commonly 1200 by 630 pixels. Paste the URL into LinkedIn’s Post Inspector to preview it and refresh the cache.
- Structured data, such as Organization or LocalBusiness in JSON-LD, tested with Google’s Rich Results Test.
- No placeholder text. Search the database for “lorem ipsum”, “test” and the staging domain.
- Real legal pages: privacy policy, cookie policy, and terms where needed.
How do you launch a website without downtime?
Prepare everything on the new server first, take a full backup, lower the DNS TTL a day or two ahead, then switch the records during a low-traffic window. Keep the old server running until traffic has fully moved. If something breaks, point DNS back, and with a short TTL that change spreads quickly.
TTL is the number of seconds resolvers may cache a DNS record. If your A record has a TTL of 86400, some visitors could keep hitting the old server for up to a day after you change it. Lower it to around 300 seconds at least one full old-TTL period before launch. After everything’s stable, raise it back up.
Backups get their own rule. Take one right before launch, store it off the server, and know how to restore it. A backup you’ve never restored is a hope, not a plan. I also keep a short written rollback plan: what to revert, in which order, and who does it.
Staging and production should differ on purpose, not by accident. WordPress has a WP_ENVIRONMENT_TYPE constant for exactly this, with values like staging and production. Plugins and your own code can read it with wp_get_environment_type() and switch off things like outgoing email or payment live mode on staging.
// wp-config.php on the live server
define( 'WP_ENVIRONMENT_TYPE', 'production' );
define( 'WP_DEBUG', false );
When you move a database from staging to live, replace the old domain everywhere, including serialized data. WP-CLI handles that safely. Run it with --dry-run first:
wp search-replace 'https://staging.example.com' 'https://example.com' --skip-columns=guid --dry-runAlso check payment gateways are in live mode with live keys, SMTP points at production, and any API keys are the client’s own, not your test ones.

What should you check in the first 24 hours after launch?
Confirm the site is reachable on every hostname, set up uptime monitoring, re-run your redirect and form tests on the live domain, watch server error logs, and check Search Console for crawl problems. Then remove test users, staging access, and any temporary admin accounts you created during the build.
Uptime monitoring is cheap and it’s the thing that tells you about a problem before the client does. Plenty of services check the homepage every few minutes and send an alert by email or chat. I also add a check for a key inner page, since a homepage served from cache can look fine while the rest of the site throws errors.
Account cleanup is a security check, not housekeeping. List the admins and remove anything that shouldn’t be there:
wp user list --role=administrator --fields=ID,user_login,user_emailDelete test customers and orders on WooCommerce sites. Remove any password protection or IP allowlists left over from staging. Make sure the client’s admin account uses a strong password and, ideally, two-factor login. If you added security headers like a Content Security Policy, check the console for blocked resources once real traffic arrives.
What should a client handoff document include?
A handoff document lists where everything lives and how to keep it running: hosting, domain registrar, DNS, email provider, logins stored in a password manager, renewal dates, backup location and restore steps, installed plugins and licenses, analytics access, and who to contact for support. Keep it to a few pages.
The client won’t read a manual. They will search a short document the day the domain is about to expire. So I write it for that moment.
What I include:
- Accounts and owners, with the client as the owner wherever possible, not me.
- Renewal dates for the domain, hosting, SSL if it’s paid, and premium plugin licenses.
- Where backups are stored, how often they run, and how to restore one.
- How to edit the common things, like adding a blog post or changing opening hours.
- What’s covered by my support and what isn’t.
Then I walk them through it on a short call. That last step saves a lot of confused emails later.
The checklist only works if you run it every time
The website launch checklist isn’t clever. It’s just written down, and that’s the whole point. The checks that hurt most at launch are the tiny ones you were sure you’d remember: a checkbox under Settings > Reading, one missing DNS record, a redirect rule left on staging.
If you take one thing from this, open your last launched site right now, view the page source, and search for noindex. Then run curl -I on an old URL. Two minutes, and you’ll know.